
10 Breville Barista Express User Manual Tips
Have you been seeking out additional tips regarding the breville barista express user manual?
If so, then welcome to RunDreamAchieve Coffee. I am glad you have made it here. We have a wide variety of delicious coffee available here. My hope is that this post and the resources located here will be what you were looking for.
Also, if interested in running or fitness be sure to check out our main site, RunDreamAchieve. There are numerous fitness resources there to set you up for success with your fitness goals.
Be sure to subscribe to the RunDreamAchieve YouTube channel. My aim there is to create new weekly content to help runner like you get to the next level in your training and racing.
If you've just got your hands on the Breville Barista Express, you're in for a treat. This espresso machine is known for making delicious coffee, but it can be a bit tricky to figure out at first. Don't worry, though! In this article, we're sharing ten handy tips from the Breville Barista Express User Manual to help you get started and make the most of your new machine. Whether you're a coffee novice or a seasoned pro, these tips will guide you in brewing that perfect cup.
Breville Barista Express User Manual Post Overview
- Always read the Breville Barista Express User Manual before using the machine.
- Keep your portafilter clean to ensure a proper seal and better extraction.
- Experiment with grind sizes and coffee amounts to find your perfect brew.
- Use the built-in grinder for fresh grounds, but measure your beans for accuracy.
- Regularly clean your machine and its components to maintain optimal performance.
1. User Manual
Okay, so you've unboxed your shiny new Breville Barista Express. Exciting, right? But before you start dreaming of becoming a home barista, let's talk about the user manual. I know, I know, reading instructions isn't exactly thrilling, but trust me, it's the best first step.
The manual is your best friend when you're first starting out. It's packed with all sorts of useful information that will save you time and frustration down the road. Think of it as your personal guide to espresso nirvana.
GET YOUR BREVILLE ESPRESSO MACHINE BY CLICKING HERE.
Here's why you should crack it open:
- Assembly: It shows you how to put everything together correctly. You don't want to skip a step and end up with a machine that doesn't work.
- Initial Setup: There are usually some things you need to do before your first use, like washing parts and setting up the water filter.
- Troubleshooting: The manual has a troubleshooting section that can help you solve common problems. This can save you from having to call customer support for simple issues.
Seriously, take the time to read through it. It'll make your espresso journey much smoother. You'll learn about the machine's features, how to use them, and how to keep everything clean and running smoothly. Plus, you'll avoid making some common mistakes that can ruin your coffee.
So, grab a cup of coffee (maybe from your old coffee maker for now!), settle in, and give that manual a good read. You'll be glad you did!
2. Built-In Grinder
Okay, let's talk about the built-in grinder on the Breville Barista Express. It's a pretty convenient feature, but it can also be a source of frustration if you don't know how to use it right. I mean, who wants inconsistent grinds messing up their morning coffee, right?
First off, it's important to understand that this grinder isn't perfect. It's not a top-of-the-line, standalone grinder, so you can't expect it to perform like one. However, with a little bit of tweaking and understanding, you can definitely get decent results.
Here's the thing: the grinder works based on time, not weight. This means it grinds for a set amount of time, regardless of how much coffee actually comes out. This can lead to inconsistencies, especially if your beans are different sizes or densities. To combat this, I'd suggest using a scale to measure your dose each time. It takes an extra ten seconds, but it's worth it for a more consistent shot.
The factory settings are almost never ideal for most beans. You'll need to dial it in to get the best results. This means adjusting the grind size and grind amount until you're getting the extraction you want.
Also, don't be afraid to experiment with the grind size. Start with the recommended setting (usually around 5), but don't be afraid to go finer or coarser depending on how your shots are pulling. If your shots are pulling too fast, go finer. If they're pulling too slow, go coarser. It's all about finding that sweet spot. If you want to adjust the top burr, you can also do that.
Finally, keep the grinder clean! Coffee oils can build up over time and affect the grinder's performance. Use a grinder brush to clean it regularly, and consider using a grinder cleaning product every once in a while.
3. Portafilter
The portafilter is where the magic starts to happen. It's that little metal basket you lock into the machine's group head. Making sure you're using it correctly is key to a good espresso shot.
First things first, always make sure your portafilter is clean and dry before you grind your coffee. Any leftover grounds or moisture can mess with the extraction. I usually give mine a quick wipe with a dry cloth before each use.
Now, when it comes to filling the portafilter, consistency is your friend. Here's a simple breakdown:
- Single Shot: Aim for around 8-10 grams of ground coffee.
- Double Shot: You'll want about 15-18 grams.
- Adjust Grind: Adjust the grind size to dial in your shot.
I've found that weighing the portafilter before and after grinding helps me get the exact amount every time. You can "zero" out the scale with the empty portafilter on it, then grind directly into it until you reach your target weight. This eliminates any guesswork.
Before locking the portafilter into the machine, give it a gentle tap on the side to settle the grounds. This helps to distribute the coffee evenly and prevents channeling during extraction.
Also, don't forget to wipe off any excess grounds from the rim of the portafilter before you lock it in. Loose grounds can prevent a proper seal, leading to a messy and uneven extraction.
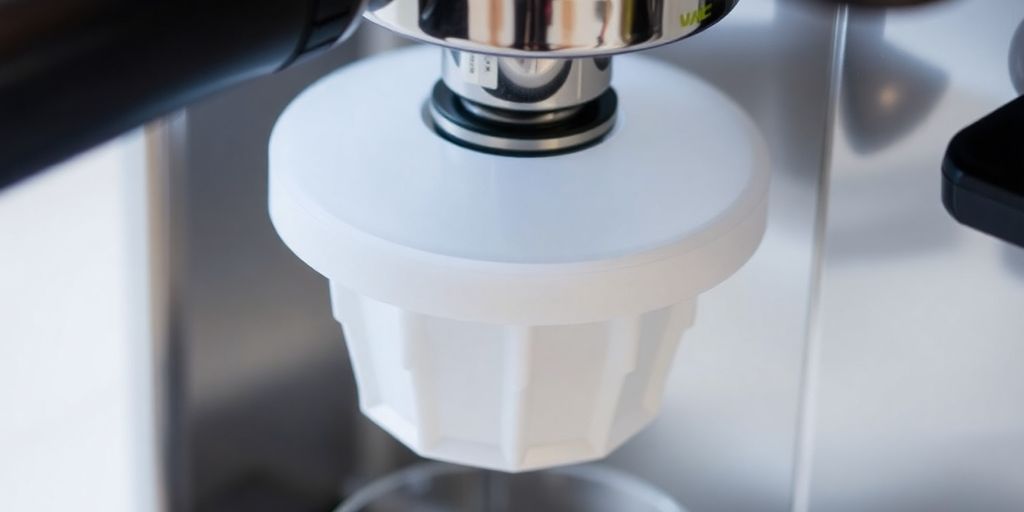
4. Dosing Cup
Using a dosing cup can seriously up your espresso game. I didn't think much of it at first, but now I'm a total convert. It's one of those little things that makes a surprisingly big difference.
The main reason I like it is for cleanliness. Grinding directly into the portafilter? Forget about it – grounds everywhere. The dosing cup contains the mess, making cleanup way easier. Plus, it helps with consistency.
Here's why you might want to consider one:
- Less mess: Keeps coffee grounds contained.
- Consistent dosing: Easier to weigh your dose accurately.
- Better distribution: Helps distribute grounds evenly in the portafilter.
Honestly, before I started using a dosing cup, I was making a mess every single time I made espresso. Now, it's a much cleaner process, and I feel like I'm wasting less coffee. It's a small investment that pays off big time.
It's also useful for a technique where you invert the portafilter onto the dosing cup, shake it to distribute the grounds, and then tap it to settle before tamping. It's a bit of a process, but it really helps with even extraction. You can also use a portafilter funnel, but I prefer the cup.
5. Tamper
The Breville Barista Express comes with a built-in tamper, which is pretty handy. It's located on the side of the machine and swings out for use. Honestly, it's not the best tamper out there, but it gets the job done, especially when you're just starting out.
Here's the thing about tamping: it's all about consistency. You want to apply even pressure every time to ensure the water flows through the coffee grounds evenly. If you don't tamp hard enough, the water will rush through too quickly, resulting in a weak, sour shot. Tamp too hard, and you'll end up with a bitter, over-extracted mess. Finding that sweet spot takes practice. You can also get a nicer tamping stations to hold your other accessories.
Here are a few tips I've picked up over time:
- Make sure the coffee grounds are evenly distributed in the portafilter before tamping. You can use your finger or a distribution tool to level them out.
- Apply firm, even pressure. Aim for around 30 pounds of pressure. It might sound like a lot, but it's what you need to create a dense puck.
- Give the tamper a little twist at the end before lifting it. This helps to polish the surface of the coffee puck and create a better seal.
Tamping is one of those things that seems simple but can make a huge difference in the quality of your espresso. Don't be afraid to experiment and find what works best for you. A good starting point is to press it down to get it all flat, make sure the coffee grounds are even and level, then give it a few extra pushes to tamp down, but don’t use too much force.
GET YOUR BREVILLE ESPRESSO MACHINE BY CLICKING HERE.
If you're serious about espresso, you might want to consider upgrading to a higher-quality tamper. There are tons of options out there, from calibrated tampers that ensure consistent pressure to ergonomic tampers that are more comfortable to use. I personally use the Crema 2-in-1 Distributor & Tamper.
6. Water Filter
Okay, let's talk about the water filter. Honestly, it's one of those things you might overlook, but it's actually pretty important for keeping your Barista Express running smoothly and your coffee tasting good. Think of it like this: you wouldn't use dirty water to make tea, right? Same principle applies here.
The water filter helps remove impurities from your water, which can affect the flavor of your espresso and potentially damage the machine over time. It's a small investment that can save you headaches later on. I've definitely noticed a difference in the taste of my coffee since I started using filtered water. Plus, it probably helps with scaling, which is always a good thing.
Here's a few things to keep in mind about the water filter:
- Replace it regularly. The manual will tell you how often, but it's usually every couple of months, depending on how much you use the machine and the hardness of your water. You can buy replacement water filters online or at most stores that sell the Barista Express.
- Soak the new filter before using it. This helps activate the filter and remove any loose particles.
- Make sure you insert the filter correctly. It should fit snugly in the water tank. If it's loose, it won't work properly.
Using filtered water is a simple way to improve the quality of your espresso and extend the life of your machine. It's a small step that can make a big difference.
I've found that using a charcoal water filter really makes a difference. You can even use filtered water from a pitcher if you don't want to use the one that comes with the machine. Just make sure it's good quality!
7. Cleaning Kit
Okay, so the Breville Barista Express comes with a cleaning kit, which is pretty standard. It's not the most exciting part, but definitely important if you want your machine to last and your coffee to taste good. Let's see what's usually inside.
- Descaling Solution: This is key for keeping mineral buildup at bay. You'll want to descale your machine regularly, especially if you have hard water. The descaling solution helps break down those deposits.
- Cleaning Tablets: These are for backflushing, which cleans the group head. It's a good way to remove coffee oils and residue that can affect the flavor of your espresso.
- Cleaning Brush: A small brush is included for cleaning the group head and other hard-to-reach areas. It's useful for getting rid of loose grounds.
Keeping your machine clean is super important. If you don't clean it regularly, the coffee will start to taste bad, and the machine might break down sooner. It's like brushing your teeth – you gotta do it!
It's worth noting that while the kit is a good start, you might want to invest in some extra cleaning supplies down the road. For example, a good quality microfiber cloth is always handy for wiping down the machine. Also, don't forget to clean the steam wand after each use! That's a big one for preventing milk buildup.
8. Milk Frother
Okay, so you've pulled your shot, now it's time to get that milk nice and frothy. The Breville Barista Express has a pretty decent milk frother, but like anything, it takes a little practice to get it just right. I remember the first few times I tried, I ended up with either scalding hot milk or a jug full of bubbles – not exactly latte art material!
First things first, always purge the steam wand before you even think about sticking it in the milk. Just turn the dial to 'Steam' with the wand over the drip tray. You'll get some water sputtering out, then steam. This gets rid of any condensation and makes sure you're only steaming the milk, not watering it down.
Fill the milk jug – there's usually a little marker inside, a 'V' shape, that tells you how much to pour. Cold milk is key here; some people even chill their jugs in the freezer beforehand. Whole milk works best because of the higher fat content, which helps create a richer, smoother froth.
Now, for the steaming itself, position the tip of the wand just under the surface of the milk. Tilt the jug slightly to create a whirlpool effect. You want the milk to swirl around, incorporating air and creating those tiny microfoam bubbles that are perfect for latte art. If the tip is too high, you'll get big, bubbly froth. Too low, and it'll screech like crazy.
Keep steaming until the jug starts to feel too hot to hold comfortably. That's usually around 150-160°F (65-70°C). Turn the dial back to 'Standby', and give the jug a tap on the counter to get rid of any big bubbles. Swirl it gently to blend the milk and foam. And don't forget to wipe down the steam wand immediately with a damp cloth! Dried milk is a pain to clean off.
9. Recipe Booklet
So, you've got your Breville Barista Express, and you're ready to make some coffee. But what exactly should you make? That's where the recipe booklet comes in handy. It's not just some throwaway pamphlet; it's actually a pretty decent starting point for your espresso journey.
The recipe booklet included with the Breville Barista Express is a great starting point for new users. It offers a variety of recipes to try, from basic espresso drinks to more elaborate creations.
Think of it as your coffee-making training wheels. It's got the basics covered, and it'll help you get a feel for the machine before you start experimenting on your own. Plus, it's a nice way to discover new drinks you might not have thought of trying. I mean, who knows? Maybe you'll find your new favorite latte recipe in there.
Don't underestimate the value of the recipe booklet. It's a quick and easy way to get familiar with your machine and start making delicious coffee right away. It's also a good reference point for troubleshooting and understanding the basics of espresso extraction.
Here's what you can typically find inside:
- Basic espresso recipes (single shot, double shot)
- Milk-based drink recipes (cappuccino, latte, flat white)
- Iced coffee variations
- Tips for adjusting grind size and extraction time
And if you want to reprogram the espresso shot volume, you can always refer to the user manual for detailed instructions.
10. WDT Tool
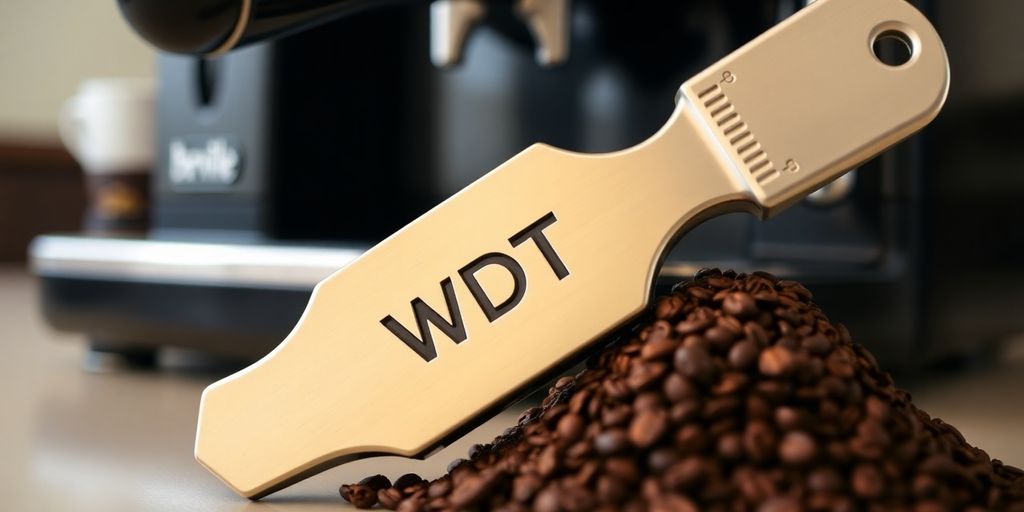
So, you've got your Breville Barista Express, and you're pulling shots, but something's just off. Maybe you're seeing channeling, or your extractions are inconsistent. That's where the WDT (Weiss Distribution Technique) tool comes in. It's a simple tool, but it can make a big difference.
A WDT tool helps to evenly distribute coffee grounds in your portafilter before tamping. This breaks up clumps and eliminates air pockets, leading to a more even extraction.
Think of it like this:
- Even Distribution: The WDT tool ensures the coffee grounds are evenly spread, preventing dense areas that water struggles to penetrate.
- Reduced Channeling: By breaking up clumps, you minimize the chance of water finding easy paths through the puck, leading to a more balanced extraction.
- Improved Extraction: A well-distributed puck results in a more consistent and flavorful espresso shot.
Using a WDT tool might seem like an extra step, but it's a small investment of time that can significantly improve the quality of your espresso. It's all about consistency and getting the most out of your beans.
I've found that using a WDT tool has really helped me dial in my shots. It's not a magic bullet, but it's definitely a valuable tool in the espresso-making process.
Wrapping It Up
So there you have it! Those tips should help you get the most out of your Breville Barista Express. Remember, practice makes perfect. Don’t be afraid to experiment a bit with your grind settings and coffee types. It might take some time to get everything just right, but once you do, you’ll be brewing café-quality espresso at home. And hey, if you run into any hiccups, just refer back to this guide. Enjoy your coffee journey!
Frequently Asked Questions
What is the Breville Barista Express?
The Breville Barista Express is a popular espresso machine that has a built-in grinder, making it easy to brew fresh coffee at home.
How do I clean the machine?
To clean the Breville Barista Express, regularly rinse the portafilter and group head, and follow the cleaning instructions in the user manual.
Can I use pre-ground coffee?
Yes, but it’s best to use freshly ground coffee for the best flavor. If using pre-ground coffee, make sure to use the correct basket size.
What type of water should I use?
Use filtered water to fill the water tank, as it helps improve the taste of your coffee and keeps the machine in good condition.
How do I froth milk with this machine?
To froth milk, fill a pitcher with cold milk, insert the steam wand into the milk, and turn on the steam function. Move the pitcher to create a whirlpool effect.
What is the WDT tool and do I need it?
The WDT tool helps to aerate coffee grounds for better extraction. It’s not essential but can improve your espresso shots.
GET YOUR BREVILLE ESPRESSO MACHINE BY CLICKING HERE.