
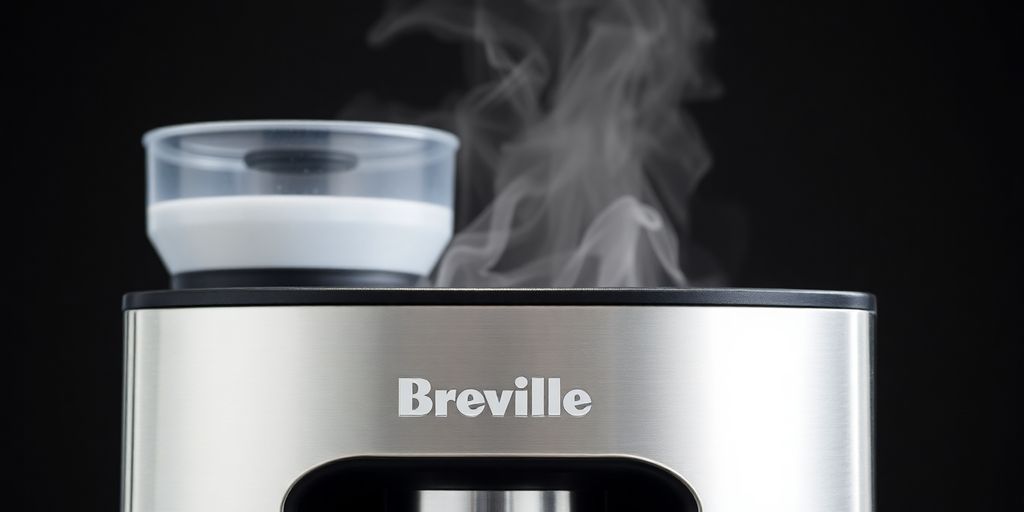
The Breville Descale Process for Coffee Lovers
Have you been looking for more information on the breville descale method for your device?
If so, then welcome to RunDreamAchieve Coffee. I am glad you have made it here. We have a wide variety of delicious coffee available here. My hope is that this post and the resources located here will be what you were looking for.
Also, if interested in running or fitness be sure to check out our main site, RunDreamAchieve. There are numerous fitness resources there to set you up for success with your fitness goals.
Be sure to subscribe to the RunDreamAchieve YouTube channel. My aim there is to create new weekly content to help runner like you get to the next level in your training and racing.
Keeping your Breville coffee machine running smoothly is key to enjoying great coffee every day. Over time, minerals from your water can build up inside, affecting how your machine works and, more importantly, how your coffee tastes.
That's where the Breville descale process comes in. It might sound a bit technical, but it's really just a way to clean out that gunk. Think of it like giving your machine a much-needed spa day. l will walk you through exactly what you need to do to keep your Breville making delicious coffee for years to come.
Key Takeaways
- Regularly descaling your Breville machine helps it last longer and makes your coffee taste better.
- Mineral buildup from water can clog your machine and affect brewing temperature and flavor.
- Descale your Breville every 3 months or when the 'descale' light comes on, depending on your water hardness and usage.
- Use a proper descaling solution, not vinegar, as vinegar can potentially damage your machine.
- After descaling, always perform a fresh water rinse to remove any residual solution and ensure your coffee tastes great.
Understanding The Breville Descale Process
So, you've got a Breville coffee machine, and you're wondering about this whole 'descaling' thing. It sounds a bit technical, but really, it's just about keeping your machine happy and your coffee tasting great. Think of it like giving your machine a good internal bath to get rid of any gunk that builds up over time.
What Exactly Is Descaling?
Descaling is basically the process of removing mineral deposits, mainly calcium and lime, that accumulate inside your coffee machine from the water you use. These minerals are naturally present in tap water.
Over time, they can build up on the internal components, like the heating element and pipes. This buildup can affect how hot your water gets and how efficiently the machine works. It's not harmful to drink, but it's definitely not great for your machine's performance or the taste of your coffee.
Why Regular Breville Descale Matters
Skipping the descale process means those mineral deposits keep growing. This can lead to a few problems. First, it can slow down the water flow, making your brewing process take longer. More importantly, it can prevent the water from reaching the optimal brewing temperature, which really messes with the flavor extraction.
You might end up with weak, bitter coffee. Plus, a machine struggling against scale buildup might not last as long. Keeping up with descaling helps maintain consistent brewing temperatures and ensures you get the best flavor from your coffee beans, every single time. It's a simple step that makes a big difference in your daily cup.
SHOP FOR ESPRESSO MACHINES TODAY BY CLICKING HERE
How Often Should You Breville Descale?
Breville usually suggests descaling every three months or after about 300 coffees, whichever comes first. However, this can change depending on your water's hardness. If you live in an area with hard water (lots of minerals), you might need to descale more often, maybe every couple of months.
If you notice a 'descale' indicator light on your machine, that's your cue to get it done right away. It's a good idea to keep an eye on your machine and how your coffee tastes; these are good indicators of when it's time for a descale. You can check out the Breville water filter replacement schedule too, as that's part of keeping things running smoothly.
The frequency really boils down to your specific water supply. Hard water areas mean more frequent descaling. It's better to descale a bit more often than not at all to protect your machine and your coffee's taste.
Preparing For Your Breville Descale
Getting ready to descale your Breville machine is pretty straightforward, but doing it right means you'll get the best results and keep your coffee tasting great. It’s not a super complicated process, but there are a few things you’ll want to have on hand and a couple of steps to follow before you even hit the 'descale' button.
Gathering Essential Supplies
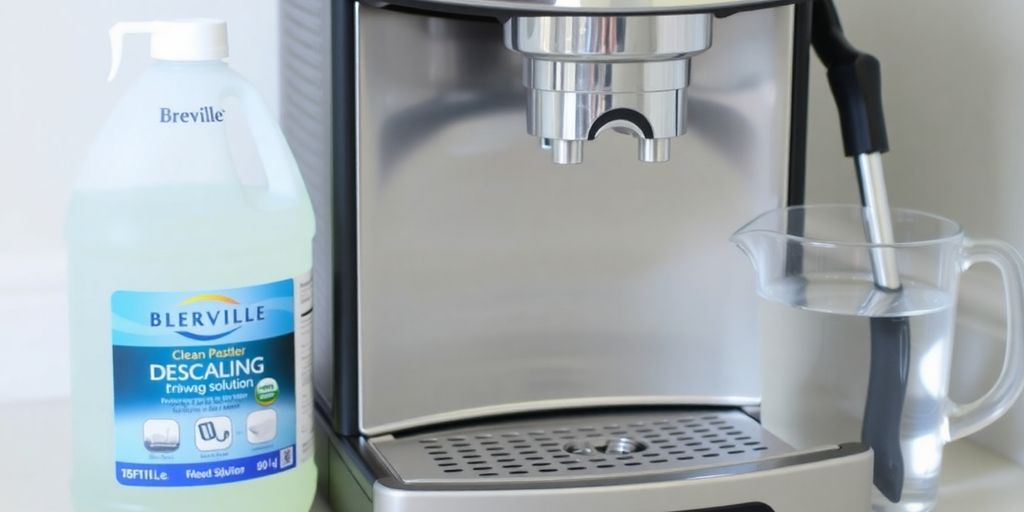
Before you start, make sure you have everything you need. You'll definitely need your Breville machine, of course, and the descaling solution. Breville offers its own specific descaling solution, which is a safe bet, but you can also find other compatible options. Just be sure to check that whatever you buy is suitable for espresso machines.
You'll also need a container, something like a 1-liter jug or a large bowl, to catch the water and solution as it runs through the machine. And don't forget a clean cloth for wiping things down afterward.
Cleaning Key Components
It’s a good idea to give your machine a quick clean before you begin the descaling process. This means emptying and rinsing the drip tray. Also, take out the water reservoir, give it a good rinse, and make sure there’s no old water or debris inside. If you have a portafilter, it’s also a good time to give that a quick clean. This just helps ensure that the descaling solution can do its job without any other gunk getting in the way. It’s like prepping your kitchen before you start cooking a big meal.
Choosing Your Descaling Solution
When it comes to the descaling solution, you have a couple of choices. Breville sells its own branded descaler, which is formulated specifically for their machines. You can pick this up directly from Breville or other retailers.
Alternatively, many people opt for generic descaling solutions designed for espresso machines. If you go this route, just double-check the ingredients to make sure it's safe for your specific Breville model. Some people even use a mixture of white vinegar and water, but this can sometimes leave a lingering taste if not rinsed thoroughly, so the commercial solutions are often preferred for simplicity and effectiveness.
Executing The Breville Descale Cycle
Now that you've got everything ready, it's time to actually run the descaling cycle. This part is pretty straightforward, but you'll want to pay attention to the machine's signals.
Initiating Descaling Mode
First things first, make sure your water tank is filled with the descaling solution mixed with water, up to the 'DESCALING' line. If you're using the official Breville descaler, that's usually one 120ml bottle topped up with water. If you're using a different brand, just follow their specific instructions.
Place a large container, like a 1-liter jug, under the steam wand, hot water spout, and coffee group head to catch the solution. To get the machine into descaling mode, press the 'MENU' button. Then, use the 'GRIND-SETTING WHEEL' to scroll through the options until you find 'DESCALE'. The 'ONE CUP' button should light up, indicating it's ready to go.
Running The Descaling Solution
Once 'ONE CUP' is lit, press it to start the descaling process. Your machine's display will likely show something like 'd3 DESCALE'. The machine will then go through a few stages, and you'll need to manually help it along. It usually beeps to let you know it's time to move to the next step. When you hear that first beep, use the 'STEAM DIAL' to switch the setting to 'HOT WATER'. The display should change to 'd2 DESCALE'.
When it beeps again, turn the 'STEAM DIAL' to 'STEAM', and the display will show 'd1 DESCALE'. After this, the machine will signal that it's finished the descaling part, often by displaying 'r DESCALE'. Let the machine sit for about five minutes to let the solution work its magic on any buildup. It's important to get the descaling done regularly to keep your machine running well, so don't skip this step. You can find more information on how often to descale on Breville's website.
Understanding The Stages
The descaling cycle isn't just one long pour; it's broken down into distinct phases to tackle different parts of the machine. You'll typically see three main stages: the initial descaling solution rinse, a hot water rinse, and a steam wand rinse. Each stage is designed to flush out mineral deposits from specific pathways within your Breville.
The machine will guide you through these by beeping and changing the display. Paying attention to these cues is key to completing the cycle correctly. It's a bit like a guided tour for your coffee maker's internal plumbing.
SHOP FOR ESPRESSO MACHINES TODAY BY CLICKING HERE
Completing The Breville Descale Procedure
Alright, so you've gone through the whole descaling cycle, and your machine has beeped its way through the different stages. Now comes the really important part: getting all that descaling solution out of there. If you don't rinse properly, your next cup of coffee might taste a little... off. Think vaguely chemical, not delicious. We need to make sure the machine is completely clear of any residue.
Performing A Fresh Water Rinse
First things first, grab some fresh, clean water. Fill up your water reservoir all the way to the MAX line. Make sure you've got a container ready under the group head and steam wand again – you don't want any of that leftover descaler dripping onto your counter. Just press the 'ONE CUP' button. Your machine will start running plain water through the system. This is the first pass to flush everything out.
Repeating The Rinse Cycle
Breville usually recommends doing this rinse cycle a couple of times. So, after the first rinse is done, empty out the collection jug. Refill the water tank with fresh water if needed, and then repeat the process.
Press the 'ONE CUP' button again and let it run through. Some people even like to run a rinse through the steam wand and hot water spout separately, just to be extra sure. It’s a good idea to check your specific model’s manual, but generally, two full rinses should do the trick.
Finalizing The Descale Process
Once you've completed the final rinse cycle, it's time to wrap things up. Turn off your machine. Give the portafilter, filter basket, and the cleaning disc a good rinse under the tap to get rid of any lingering solution. Empty and clean the drip tray. Reassemble everything, and you're pretty much done.
Your Breville machine should now be free of mineral buildup and ready to brew. It's a good idea to run one more short cycle with just plain water to be absolutely certain everything is clear before you make your first post-descale coffee. You can find more details on the Breville cleaning cycle if you need a visual aid.
Maintaining Your Machine Post-Breville Descale
So, you’ve gone through the whole descaling process. Nice job! But don't just put the lid back on and forget about it. Keeping your Breville machine in good shape after descaling is pretty important if you want it to keep making great coffee. It’s not super complicated, really.
Replacing The Water Filter
This is a big one. If you’ve got hard water where you live, mineral buildup is going to happen, and that’s what descaling fights. But even with descaling, a good water filter helps a lot. Breville usually recommends changing the water filter every two months.
It’s a pretty simple job. You just pull out the old one from the water tank, pop in a new one, and set the little reminder dial. It’s a good idea to get into the habit of doing this regularly. You can find replacement filters easily enough, and it really does make a difference in keeping things clean inside.
Routine Cleaning Practices
Beyond the big descaling event, there are some smaller things you should do regularly. Wiping down the exterior after use is a good idea to keep it looking nice and prevent coffee splashes from hardening. Make sure to empty and rinse the drip tray often, too. Nobody likes a funky drip tray.
If you make milk drinks, cleaning the steam wand right after you use it is a must. Milk residue can get pretty gross if left sitting there. A quick rinse and wipe usually does the trick. Basically, little bits of cleaning here and there stop bigger problems from popping up later. It’s like doing your dishes right after dinner instead of letting them pile up – much easier in the long run!
Think of regular maintenance as a way to prevent future headaches. A little effort now saves you from bigger issues down the road, like clogs or a machine that just doesn't heat up properly anymore. Plus, your coffee will taste better.
Troubleshooting Common Breville Descale Issues
Sometimes, even with the best intentions, things don't go perfectly during the descaling process. Don't worry, most issues are pretty common and have straightforward fixes. Let's look at a few things that might pop up and how to handle them.
Addressing Foaming During Descaling
If you notice a lot of foam coming out of your machine while descaling, it's usually not a big deal. This is often just the descaling solution reacting with the mineral deposits inside your machine. It's a sign the cleaner is doing its job! Just let the cycle continue.
Try not to overreact to the foam; it's a normal part of the cleaning action. If it seems excessive, make sure you're using the correct amount of descaling solution as recommended by the manufacturer. Using too much can sometimes lead to extra foaming.
Ensuring Proper Brewer Filling
Another hiccup can be when the brewer doesn't seem to be filling up correctly during the descaling cycle. This could mean there's a blockage somewhere in the system, possibly from scale buildup or even a piece of the descaling tablet not fully dissolving.
Here’s a quick checklist:
- Check the water tank: Make sure it's seated properly and there are no air gaps.
- Inspect the descaling solution: If you're using tablets, ensure it has completely dissolved before starting. If it hasn't, the machine might struggle to pull the solution through.
- Look for blockages: Sometimes, the small holes in the group head or the steam wand can get clogged. A gentle poke with a fine needle or a specialized cleaning tool might help, but be careful not to damage anything.
- Reset the machine: Occasionally, a simple reset can clear minor electronic glitches. Unplug your Breville for about 10 minutes, then plug it back in and try the descaling process again. You can find more detailed troubleshooting steps on the Breville support page.
When To Seek Further Assistance
While most descaling issues are manageable, there are times when you might need a bit more help. If you've tried the common fixes and your machine is still acting up, it's probably time to get in touch with Breville support.
Consider reaching out if:
- The machine continues to show error codes after descaling and rinsing.
- There's no water flow at all, even after checking for blockages.
- You're unsure about any step and want professional guidance.
- The machine seems to be leaking from somewhere it shouldn't be.
Remember, regular descaling is key to keeping your machine running smoothly, but if you encounter persistent problems, don't hesitate to seek expert advice. It's better to get it sorted properly than risk damaging your beloved coffee maker.
Keep Your Breville Brewing Great Coffee
So, that's the rundown on keeping your Breville Barista Pro clean and running smoothly. It might seem like a bit of a chore at first, but honestly, it's pretty straightforward once you've done it a couple of times.
Think of it like giving your car an oil change – necessary maintenance that keeps things running right. Doing this regularly means you'll keep getting those delicious cups of coffee without any weird tastes or slow brewing. Plus, you're saving your machine from potential problems down the road. It’s really worth the small effort to keep your coffee tasting its best.
Frequently Asked Questions
What exactly is descaling?
Descaling means cleaning out the mineral buildup, like calcium and lime, that can form inside your coffee machine from the water. This buildup can make your coffee taste bad or even stop your machine from working right.
Why is it important to descale my Breville machine?
It's super important to descale your Breville machine regularly. Doing so keeps your coffee tasting its best and helps your machine last much longer. Think of it like giving your machine a good cleaning to keep it running smoothly.
How often should I descale my Breville machine?
Breville suggests descaling every three months or after about 300 coffees. If you use your machine a lot or if your tap water has a lot of minerals (hard water), you might need to descale it more often.
Why is there foam coming out of my coffee machine when I descale it?
When you descale, you might see foam coming out. This is normal! It's just the cleaning solution reacting with the mineral deposits inside the machine.
Can I use vinegar to descale my Breville machine instead of a special solution?
While you can use vinegar, it's not the best choice. Vinegar can sometimes break off scale in large pieces that might clog your machine. It's safer to use a special descaling solution made for coffee machines.
What happens if I don't descale my coffee machine?
If you don't descale your machine, mineral buildup can block the water flow and prevent it from heating the water properly. This means your coffee won't taste as good, and eventually, the machine might stop working altogether.