
11 Reasons to Get a Camping Coffee Percolator
Have you wondered what are the benefits of investing in a camping coffee percolator?
If so, then welcome to RunDreamAchieve Coffee. I am glad you have made it here. We have a wide variety of delicious coffee available here. My hope is that this post and the resources located here will be what you were looking for.
Also, if interested in running or fitness be sure to check out our main site, RunDreamAchieve. There are numerous fitness resources there to set you up for success with your fitness goals.
Be sure to subscribe to the RunDreamAchieve YouTube channel. My aim there is to create new weekly content to help runner like you get to the next level in your training and racing.
Thinking about brewing coffee outdoors? A good camping coffee percolator might be just what you need. They're a classic way to get your morning fix when you're out in nature.
Forget fancy gadgets; percolators are simple, tough, and they make a strong cup of joe. If you're wondering what makes them so great for camping, you're in the right place. Let's dive into 11 reasons why a camping coffee percolator is a solid choice for your next adventure.
Key Post Takeaways
- Camping coffee percolators are built tough for outdoor use.
- They make strong coffee without needing electricity.
- Look for features like a good handle and tight lid.
- You'll want to use coarse ground coffee for the best results.
- Stainless steel models are often very durable and last a long time.
1. Cover Hinge
The cover hinge on a camping coffee percolator might seem like a small detail, but it's actually pretty important. A well-designed hinge ensures the lid stays securely closed during the perking process, preventing messy spills and helping to maintain the optimal brewing temperature. Think about it – you're out in the wilderness, maybe a bit clumsy from the early morning chill, and the last thing you want is hot coffee splashing everywhere.
- Durability: A robust hinge will withstand repeated use and the rigors of outdoor adventures.
- Material: Stainless steel hinges are less prone to rust and corrosion compared to other materials.
- Design: A smooth, easy-to-operate hinge makes filling and cleaning the percolator a breeze.
A poorly designed hinge can lead to frustration and even burns. Imagine trying to pour coffee with one hand while struggling to keep the lid from flopping open. Not fun! A good hinge is a sign of quality craftsmanship and attention to detail.
Consider the hinge when choosing a camping percolator.
2. Water Level Markings
One of the handiest features on a camping coffee percolator is the presence of water level markings. These markings, usually found inside the pot, take the guesswork out of brewing. No more eyeballing it and hoping for the best! They help you achieve the perfect coffee-to-water ratio every time.
Having these markings means you can easily measure the right amount of water, whether you're making a single cup or enough for the whole campsite. It's especially useful when you're bleary-eyed in the morning and just want a quick, reliable cup of joe. Plus, accurate water levels prevent overflow, which can lead to grounds in your coffee – nobody wants that!
Using the markings also helps maintain consistency. You'll get a similar brew each time, which is great if you're particular about your coffee's strength and flavor. It's a small detail that makes a big difference in the overall camping coffee experience. You can fill it with cold, filtered water according to the internal markings for minimum and maximum levels.
Here's why water level markings are so great:
- Consistent brewing every time.
- Reduces the risk of overflow.
- Easy to use, even when you're half-asleep.
SHOP FOR ESPRESSO MACHINES TODAY BY CLICKING HERE.
3. Perk Knob
The perk knob is that little transparent bubble, usually glass or plastic, right on top of the percolator lid. It's your window into the magic happening inside. You can literally watch the coffee brewing! It's not just for show, though. The perk knob lets you see when the water starts perking, which is a key indicator of when to start timing the brewing process.
Think of it as your percolator's eye. You'll see the water bubbling up through the stem and then, hopefully, it'll start to look like coffee. The color will change as the brew gets stronger. It's a pretty cool visual cue.
I find it way more engaging than just waiting for a beep from an electric coffee maker. Plus, it's a good way to gauge the strength of your brew. If it's too light, let it perk longer. If it's getting too dark, cut it short. It's all about personal preference. You can see the water perking in the knob.
One thing to keep in mind is that some perk knobs can get pretty hot, especially if you're using a campfire. Be careful not to touch it directly, or you might end up with a burnt finger. I usually just peek at it from a safe distance. Also, make sure it's clean before you start brewing, so you can actually see what's going on inside. A little wipe with a cloth does the trick.
Here's a quick list of why the perk knob is important:
- Visual indicator of brewing progress
- Helps determine coffee strength
- Adds a bit of old-school charm to the process
4. Heat-Resistant Handle
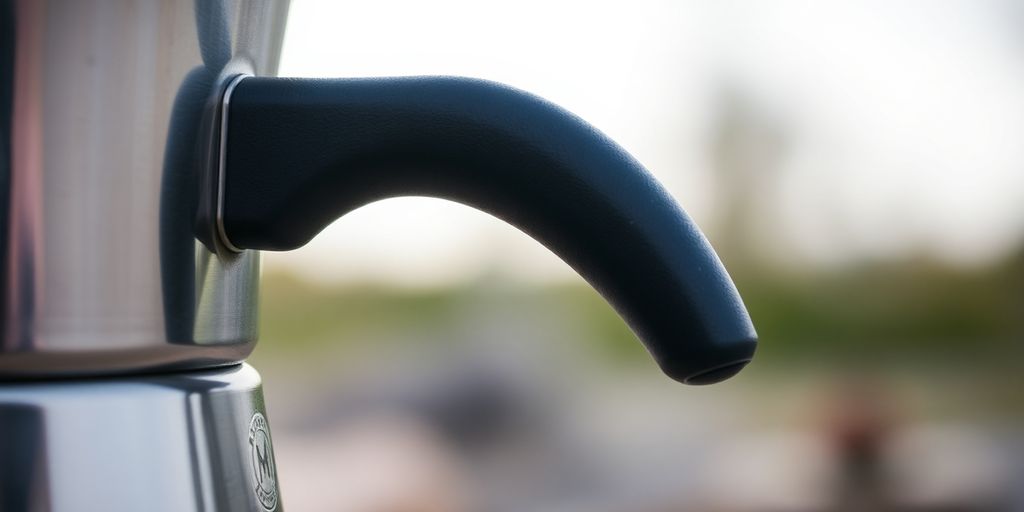
Let's be real, nobody wants to grab a coffee pot and end up with a burnt hand. That's where a heat-resistant handle comes in clutch. It's not just about comfort; it's about safety. Imagine you're out camping, the sun's barely up, and you're fumbling around trying to pour that first, crucial cup of coffee. A handle that stays cool to the touch is a game-changer.
Some percolators use silicone, which is great at blocking heat. Others might use rosewood, which looks nice and doesn't get too hot. But, not all handles are created equal. I've used some percolators where the handle gets so hot you need a cloth to hold it. Not ideal!
A good heat-resistant handle means you can focus on enjoying your coffee, not worrying about getting burned. It's a small detail that makes a big difference, especially when you're dealing with hot liquids and open flames.
Here's a quick rundown of handle materials I've seen:
- Silicone: Stays cool, easy to grip.
- Rosewood: Looks classy, decent heat resistance.
- Plastic: Can work, but quality varies a lot.
- Stainless Steel (without coating): Avoid! Gets super hot.
5. Tight Fitting Lid
So, a tight-fitting lid on your camping coffee percolator might seem like a no-brainer, but trust me, it's more important than you think. I mean, who wants coffee grounds and hot water splashing all over the place? Not me, that's for sure.
A secure lid prevents messy spills and ensures even brewing. Think about it: you're out in nature, maybe a little clumsy from the early morning chill, and the last thing you need is a coffee explosion. Plus, a loose lid can let heat escape, messing with the whole percolation process.
Here's why a tight lid is a must:
- Keeps the coffee hot longer.
- Prevents grounds from escaping into your brew.
- Reduces the risk of burns from splashing hot liquid.
I remember this one time when I was camping with my old percolator. The lid wasn't exactly snug, and every time it started perking, it would spit hot coffee everywhere. It was a total disaster. I ended up with coffee-stained clothes and a half-empty pot. Lesson learned: always check the lid!
So, when you're shopping for a percolator, give that lid a good wiggle. Make sure it fits nice and tight. You'll thank me later when you're sipping a clean, hot cup of coffee in the great outdoors. And remember, scorching the coffee is a real risk if the temperature isn't consistent!
6. Coarse Ground Coffee
Using the right coffee grind is super important for a percolator. You really need to use coarse ground coffee. Why? Because a finer grind will likely end up in your coffee, and nobody wants that gritty texture!
I remember the first time I used a percolator. I grabbed whatever coffee I had on hand, not even thinking about the grind. Let me tell you, the result was... not great. It was like drinking coffee-flavored sand. Lesson learned: coarse grind is the way to go.
Here's a few things to keep in mind:
- Why Coarse? Coarse grounds are less likely to slip through the filter basket. This means less sediment in your final cup.
- Buying Options: You can either buy pre-ground coarse coffee or grind your own. If you're grinding your own, a burr grinder is the best way to get a consistent grind.
- Experiment! Don't be afraid to play around with the grind size a little bit to find what works best for your percolator and your taste. It might take a few tries to get it just right.
If you're constantly finding grounds in your coffee, here are a few things to try:
- Wet the filter basket before adding the coffee. This helps the grounds stick to the filter.
- Consider using a coffee filter paper in addition to the filter basket. This will catch any fine particles that might slip through.
- Make sure your grind is truly coarse. If it's too fine, even a little bit, you're going to have problems.
Getting the grind right can make a huge difference in the taste of your coffee. Trust me, it's worth the effort!
7. Medium Roast Coffee
When it comes to percolators, medium roast coffee is often the sweet spot. It's not too light, not too dark, offering a balanced flavor profile that many find appealing. I've found that using a medium roast whole bean coffee really brings out the best in my percolator.
- Flavor Balance: Medium roasts typically have a good balance of acidity, sweetness, and body. This means you get a well-rounded cup of coffee without any overpowering bitterness or sourness.
- Versatility: They work well whether you're drinking your coffee black or adding milk and sugar. It's a safe bet if you're unsure what everyone in your camping group prefers.
- Less Oily: Compared to darker roasts, medium roasts tend to be less oily, which can help keep your percolator cleaner and prevent buildup over time.
I remember one camping trip where I brought a dark roast, and it was just too intense through the percolator. The medium roast is a much safer bet for pleasing everyone.
I usually aim for a specific perking time of around 7 minutes when using a medium roast. It seems to extract the flavors just right without overdoing it.
8. Stainless Steel
When it comes to camping gear, durability is key, and that's where stainless steel percolators shine. They're built to last, resisting rust and corrosion far better than other materials. I've had a few aluminum pots that didn't survive more than a couple of trips, but my stainless steel percolator is still going strong after years of use. Plus, they're generally easier to clean – burnt coffee stains wipe off much easier than on other surfaces.
SHOP FOR ESPRESSO MACHINES TODAY BY CLICKING HERE.
Here's why I think stainless steel is a great choice:
- Durability: Seriously, these things can take a beating. I've dropped mine on rocks, kicked it around (accidentally, of course), and it's still in great shape.
- Rust Resistance: Unlike some metals, stainless steel won't rust, which is a huge plus when you're dealing with water and damp conditions.
- Easy Cleaning: A quick scrub with soap and water, and you're good to go. No need for special cleaners or complicated routines.
I remember one camping trip where a friend brought an old aluminum percolator. By the end of the weekend, it was dented and corroded. Meanwhile, my stainless steel percolator looked as good as new. That's when I really appreciated the investment.
I've been really impressed with the stainless steel percolator I use; it seems to be very good quality stainless.
9. Aluminum
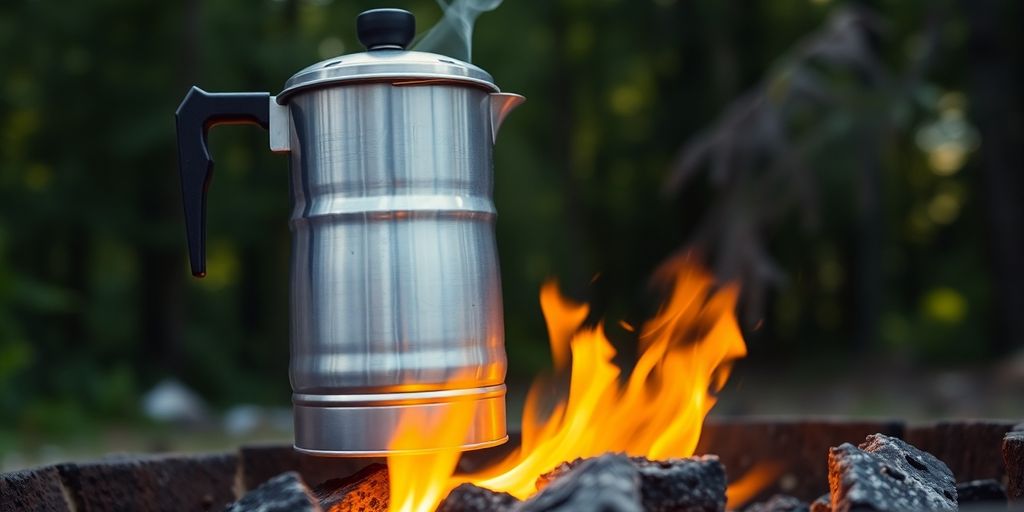
Aluminum percolators are a popular choice for camping due to their lightweight nature and affordability. They heat up quickly, which is a plus when you're eager for that morning cup of joe. However, there are a few things to keep in mind.
First off, aluminum can react with acidic foods, potentially affecting the taste of your coffee. Some folks also worry about the health implications of aluminum leaching into their brew, though the actual risk is often debated. Durability is another factor; aluminum percolators can dent or warp more easily than their stainless steel counterparts.
If you're on a tight budget and weight is a major concern, an aluminum percolator might be a good fit. Just be aware of the potential drawbacks and consider the trade-offs.
Here's a quick rundown:
- Lightweight and easy to pack
- Heats up rapidly
- More affordable than stainless steel options
- Can react with acidic liquids
- Less durable than other materials
For those looking for the best camping coffee maker, it's worth weighing these pros and cons carefully.
10. Rosewood Handle
Rosewood handles on camping coffee percolators offer a touch of elegance and a classic feel. They're not just about looks, though. A well-crafted rosewood handle can provide a comfortable and secure grip, which is especially important when you're dealing with hot coffee over a campfire.
Here's why a rosewood handle might be a good choice for you:
- Aesthetics: Rosewood has a beautiful, rich color and grain that adds a touch of class to your camping gear.
- Comfort: The smooth finish of rosewood feels good in your hand, making it easier to pour [hot coffee](#d1da] without discomfort.
- Durability: Rosewood is a dense and durable wood, able to withstand the rigors of outdoor use, though it does require some care to prevent drying and cracking.
Keep in mind that rosewood handles may require occasional oiling to maintain their appearance and prevent them from drying out. This small bit of maintenance can ensure that your percolator looks great and feels comfortable for years to come.
While rosewood is a great option, it's worth considering other handle materials like silicone, especially if you prioritize heat resistance and ease of maintenance. Silicone handles, like those found on the GSI Outdoors Glacier Coffee Percolator, offer excellent heat protection and require minimal upkeep. Ultimately, the best handle material depends on your personal preferences and how you plan to use your percolator.
11. Silicone Handle
Silicone handles are a game-changer, especially when you're dealing with hot coffee on a chilly morning. The main advantage? They stay cool to the touch. No more fumbling around with a towel or burning your fingers trying to pour that first cup.
- Heat Resistance: Silicone can withstand high temperatures without melting or degrading.
- Grip: Silicone provides a non-slip surface, even when wet.
- Durability: It's a tough material that can handle the wear and tear of camping.
Silicone handles are easy to clean, which is a huge plus when you're camping and don't have access to all your usual kitchen gadgets. Just wipe it down, and you're good to go. Plus, they don't absorb odors or flavors, so your coffee will always taste like coffee, not last night's chili.
Wrapping It Up
So, there you have it. A camping coffee percolator is a pretty solid choice for your outdoor adventures. It's simple to use, makes a good strong cup of coffee, and it's built to last. You don't need a bunch of fancy stuff, just some coffee grounds and a heat source.
Plus, there's something really nice about the whole process, watching it perk away. It just feels right when you're out in nature. If you're looking for a reliable way to get your coffee fix while camping, a percolator is definitely worth checking out. It's a classic for a reason.
Frequently Asked Questions
How does a camping coffee percolator actually make coffee?
A camping coffee percolator works by using gravity and heat. Water in the bottom chamber heats up and rises through a tube, sprinkling over coffee grounds in a basket. The coffee then drips back down, and this cycle repeats until your coffee is brewed. It's a simple, old-school way to make coffee.
What kind of coffee grounds should I use for a camping percolator?
You'll want to use coffee that's ground coarsely, like breadcrumbs. If the grind is too fine, tiny coffee bits can sneak through the filter basket and end up in your mug, making your coffee gritty.
What materials are camping percolators usually made of?
Most camping percolators are made from tough stuff like stainless steel or aluminum. These materials are great because they can handle being used over a campfire or camp stove, and they last a long time. Some might also have enamel coatings for a classic look.
What's the best heat setting for brewing coffee in a camping percolator?
When you're brewing, try to use medium to low heat. High heat can make the water boil too fast, causing your coffee to taste burnt or making the percolator boil over. A gentle simmer is all you need for a good brew.
How long does it take to brew coffee in a camping percolator?
The time it takes depends on how strong you like your coffee. Generally, it can take anywhere from 5 to 10 minutes once the water starts to perk (you'll hear bubbling and see coffee rising into the knob). Keep an eye on the color through the knob to get it just right.
How do I clean my camping coffee percolator after using it?
Cleaning is pretty easy. Once it's cool, toss out the used grounds. Then, wash the percolator with warm, soapy water. Make sure to rinse all the parts well. Some parts might be dishwasher safe, but hand washing is usually best to keep it in good shape.